

On this page
Underneath the farm sits the heart of TinyHarvest’s mid-game: the Mine, the Refinery and the Blacksmith. Together they form one long production chain. Your explorers dig up ore, the Refinery turns it into ingots and cut gems, and the Blacksmith forges gear that makes every future trip faster and richer.
This guide covers each stage and how they fit together. For the full data, see the
 Mine table.
The Valley chain at a glance
The Mine, Refinery and Blacksmith are  Valley buildings. You unlock them in order, and each
one needs the one before it.
Valley buildings. You unlock them in order, and each
one needs the one before it.
| Building | Opens at | How you open it |
|---|---|---|
| The Lake | Level 30 | Hand in materials |
| The Mine | Level 40 | Restore  the Lake first, then hand in materials the Lake first, then hand in materials |
| The Refinery | After the Mine | Opens by itself once the Mine is restored |
| The Blacksmith | Level 52 | Restore the Refinery first, then hand in materials |
“Handing in materials” means contributing items from a few categories until every progress bar fills: Raw Stone & Ore, Crafted Goods and Construction Materials for the Mine; Refined Materials, Raw Ore, Construction Materials, Crafted Goods and Raw Stone & Ore for the Blacksmith. Start stockpiling before you reach the level and you can finish quickly.
Two nice bonuses come with the restoration. Restoring the Mine brings Rocko, the Mine Foreman, to your explorer crew. Restoring the Blacksmith gives all your explorers +1 maximum stamina.
The Mine
The Mine runs on expeditions, just like the valley missions in the
 Expeditions guide. You pick a depth, pick a team and
wait for the run to finish. Only one mine expedition can run at a time.
Expeditions guide. You pick a depth, pick a team and
wait for the run to finish. Only one mine expedition can run at a time.
Sending a team
- Send 1 to 3 explorers. Each extra explorer adds more ore to the haul.
- Every explorer pays the depth’s stamina cost, or one Pickaxe instead. Pickaxes let you skip stamina, which is useful when your crew is tired.
- Your team’s combined Power (also called EP) is compared to what the depth recommends. If you are short, the run takes longer and rare drops become less likely. If you comfortably exceed the recommendation, you get a small bonus to rare drops.
- Optional: use Mining Rations to shorten the run by 25 percent.
- Stuck waiting? A Mission Potion speeds a mine run up instantly, and in the last 10 minutes you can finish a run for a few diamonds.
Explorers with the Miner trait bring extra ore. Explorers with the Lucky trait help with rare drops. Rocko, who lives in the Mine, has both the Miner and Sturdy traits and gets a Power bonus in the Mine.
The seven depths
The Mine has seven depths. Deeper ones take longer, cost more stamina and want a stronger team, but they hand out better ore. Each run earns Mine Mastery XP, and mastery is what opens the next depth.
| Depth | Mastery needed | Base time | Stamina | Main ore |
|---|---|---|---|---|
| Surface Tunnels | 0 | 1 h | 1 | Copper Ore, Coal |
| Copper Veins | 100 | 2 h | 1 | Copper Ore, Coal |
| Iron Deposits | 250 | 4 h | 2 | Iron Ore, Raw Quartz |
| Silver Seams | 500 | 6 h | 2 | Silver Ore, Silica |
| Gold Caverns | 1,000 | 8 h | 3 | Gold Ore, Raw Amber |
| Titanium Veins | 2,000 | 12 h | 3 | Titanium Ore, Raw Ruby |
| Crystal Caverns | 3,500 | 16 h | 4 | Platinum Ore, Raw Sapphire |
Every depth also has chances for rarer extras on top of its main ore: coal and iron near the top, silver, gold and amber in the middle, and platinum, sapphires and even a Diamond Shard at the bottom. Each extra rolls on its own, from 8% for a Diamond Shard up to 30% for coal. The Mine table lists every chance, and How chances change shows what more explorers, lucky explorers, Power and gear add. Exact amounts show up in the forecast before you start.
Tip: The forecast on the depth screen tells you whether your team is Optimal, Close or Underpowered, and how long the run will really take. Check it every time you change a team member.
Mine Mastery
| Tier | XP | Perk |
|---|---|---|
| Bronze | 100 | +1 mastery XP per run |
| Silver | 400 | Runs finish 3% faster |
| Gold | 1,000 | 5% chance that each reward line doubles |
| Master | 2,500 | Title Deep Warden |
Because the deeper depths give more XP per run, you rarely need to grind the shallow ones for long.
Hired Miner
If you do not have enough rested explorers, you can hire Bolt, an extra miner, with diamonds. Contracts last 24 hours, 3 days, 7 days or permanently. He joins mine runs only, and he can wear gear and gets tired just like an explorer.
The Exchange
Mine goods have a second home in the  Valley Town: the Exchange. Its keeper trades your ores,
ingots, gems and fish for useful items, with a few daily deals that rotate at midnight and a
weekly special that changes on Mondays. It opens at level 40. See the
Lake guide for its Fresh Catches tier.
Valley Town: the Exchange. Its keeper trades your ores,
ingots, gems and fish for useful items, with a few daily deals that rotate at midnight and a
weekly special that changes on Mondays. It opens at level 40. See the
Lake guide for its Fresh Catches tier.
The Refinery
The Refinery has two jobs: smelting ore into ingots and cutting raw gems.
| Smelting recipe | Input | Time |
|---|---|---|
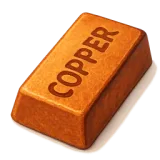 Copper Ingot Copper Ingot |
2 Copper Ore + 2 Coal | 1 h |
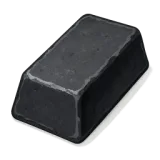 Iron Ingot Iron Ingot |
2 Iron Ore + 2 Coal | 2 h |
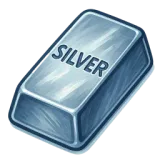 Silver Ingot Silver Ingot |
2 Silver Ore + 2 Coal | 3 h |
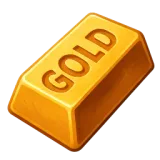 Gold Ingot Gold Ingot |
2 Gold Ore + 3 Coal | 5 h |
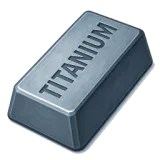 Titanium Ingot Titanium Ingot |
2 Titanium Ore + 4 Coal | 6 h |
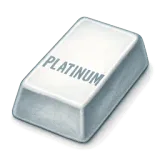 Platinum Ingot Platinum Ingot |
2 Platinum Ore + 5 Coal | 10 h |
| Gem recipe | Input | Time |
|---|---|---|
 Cut Quartz Cut Quartz |
2 Raw Quartz + 1 Stone | 1.5 h |
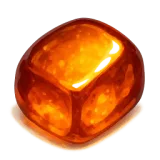 Cut Amber Cut Amber |
2 Raw Amber + 1 Silica | 2.5 h |
 Cut Ruby Cut Ruby |
2 Raw Ruby + 1 Refined Resin | 4 h |
 Cut Sapphire Cut Sapphire |
2 Raw Sapphire + 3 Silica + 1 Glowing Ore | 6 h |
 Perfect Diamond Perfect Diamond |
1 Diamond Shard + 5 Silica + 4 Moonwood | 10 h |
Gem cutting also costs a few coins per job. Coal is the fuel for every smelt, so keep a stock; Mine runs and the Mountain both supply it.
You start with one Refinery slot. Upgrading to 2, 3 and 4 slots costs coins plus a stack of copper, iron and silver ingots. Two more slots can be added with diamonds (or Premium Slot Vouchers).
The Blacksmith
The Blacksmith opens at level 52 and has three stations in one building: the Forge, the Anvil and the Crucible. Tap the “?” in the building for the in-game help.
Forging gear
The Forge makes gear for your explorers plus a few consumables. Gear comes in three slots, and each explorer can wear one piece per slot:
| Slot | Core effect | Pieces, from Copper to Platinum |
|---|---|---|
| Tool (“Tools” tab) | Shorter expeditions | Copper Compass, Iron Climbing Pick, Silver Surveyor’s Kit, Gold Cartographer’s Tool, Titanium Drill, Platinum Star Compass |
| Armor (“Gear” tab) | More Power | Copper Vest, Iron Chain Mail, Silver Guard Plate, Gold Royal Armor, Titanium Fortress Plate, Platinum Aegis |
| Accessory (“Charms” tab) | More explorer stamina | Quartz Pendant, Iron Miner’s Lantern, Amber Amulet, Ruby Ring, Sapphire Crown, Diamond Star |
Gear comes in six tiers: Copper, Iron, Silver, Gold, Titanium and Platinum. Each tier needs its own ingots or gems. You do not unlock tiers by level. Instead you unlock them in a chain: craft the tier below enough times and the next one appears in the recipe book. The first tier of each slot is open straight away.
Gear also helps in the Mine. Tools shorten the run, armor adds Power, and accessories give your explorers a bigger stamina pool.
Quality
Every piece you forge rolls a quality:
- Common (70%): most pieces come out like this.
- Rare (25%): stronger stats and an extra trait.
- Epic (5%): stronger again, with a second extra trait. Rare to get from the forge.
- Holy: the highest quality. It cannot be forged, bought or found, only made at the Anvil.
Quality multiplies the piece’s main stat: Rare is 1.5 times Common, Epic is 3 times and Holy is 5 times. Traits add smaller bonuses, such as extra rare-drop luck, a chance to save stamina, or a chance of bonus rewards.
The Anvil
After you have forged 10 pieces of gear, the Anvil and Crucible open. At the Anvil you fuse three identical pieces of the same item and quality into one piece of the next quality up: Common to Rare to Epic to Holy. Each attempt costs coins, Forge Flux and some time, and the odds get tighter the higher you go: 75% from Common to Rare, 50% from Rare to Epic and 20% from Epic to Holy. The good news: a failed fuse never destroys your gear. All three pieces come back; you only lose the fee and the time.
Holy gear gains one special trait that depends on its slot:
- Tools: a lower minimum mission time.
- Armor: shares part of its Power with every mission, even ones its wearer does not join.
- Accessories: a number of free instant finishes per day.
The Crucible
The Crucible melts gear you will not use into Forge Flux, the fuel for the Anvil. Better gear gives more Flux. Melting is permanent, but equipped gear never shows up, and the game asks before melting anything valuable. Forge Flux cannot be sold or traded.
Supplies
The Forge also crafts three useful consumables:
-
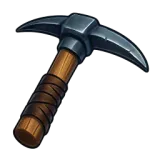 **Pickaxe**: skips the stamina cost of a mine run.
-
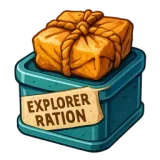 **Explorer's Ration**: gives one explorer +3 stamina.
-
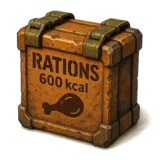 **Mining Rations**: shortens a mine run by 25 percent.
Good to know: Forge slots, Refinery slots and Anvil slots are separate. A long Anvil attempt never blocks your forge.
A simple route through it all
- Restore the Lake at level 30, then the Mine at level 40.
- Run the Surface Tunnels with Rocko and one more explorer. Collect copper and coal.
- Smelt copper ingots while you keep mining, and work up through the depths as mastery allows.
- Stockpile for the Blacksmith: ingots, ores, wood and crafted goods.
- At level 52, forge a Copper Vest or Copper Compass first. Forge ten pieces to open the Anvil and Crucible.
- Melt duplicates you do not need, and fuse the ones you do.
- Equip your best pieces on the explorers you send out most.
Tips
- Keep explorers rested. Pickaxes are a fine backup but cheaper to use sparingly.
- Aim for a team that matches or beats the recommended Power. The difference in speed and rare drops is large.
- Do not melt the last piece of a kind you might want to fuse later.
- Match your depth to your mastery. A shallow, fast run is a good use of an hour; save the 16-hour Crystal Caverns for overnight.
- Gear stats show on the explorer’s detail page, so you can compare pieces before you equip.